Yehuda Moon and the Kickstand Cyclery comics are back today. The comic was on a short hiatus while Rick Smith and Brian Griggs figured out what to do with the strip. There was a Kickstarter to raise money for Volumes 2, 3, and 4 to be printed into books. They only needed $18,000 for their goal to produce the books, but ended up with a breathtaking $44,054, from 660 backers. Which is great, I can’t wait to get my volumes in the mail anytime now I would imagine.
Open for Business 12-30-2011
Now for 2012 the comics will be published 5 days a week, Monday through Friday. The new comic will be for Kickstand Club Members, pay $1 a month or $12 for the whole year. With that it allows you to get: Access to the new comic, and view old comics by year/month on nicely organized pages. Non-members can still view old comics, they just have to navigate through on a large pull down menu or clicking through them like the old days. Members will get discounts in the store, and freebies. So become a member now to see the new comics. The comics will also appear in Bicycle Times magazine again starting with issue 15, Feb 2012. Thank you again Rick and Brian, for all the hard work with the comic and for keeping it going. YehudaMoon.com
And again, just like my post about the Kickstand Kickstarter: If you haven’t heard of Yehuda Moon you can still get started reading them, They are all online still, here is a link to the first strip. Yehuda Moon 01-22-2008
Saturday December 31st, 2011 was the REI Year-end Garage Sale in Eugene. This is a big sale at REI, where they sell slightly used gear, returns, and display items. This was the first time I have been able to go to one myself, and let me just say it was well worth the short wait in line to get in. There was a lot of great gear to pick up there and I got myself some presents that I’m quite happy about.
ALPS Mountaineering Mystique 2.0 – MSRP $199.99 bought at $9.83
This is the first real tent I have ever bought, but it seems like it will be perfect for me: 3 season, fits 2 people, pretty light at 5lb 2oz total, packs pretty small. I’m quite excited, the only thing is the tent was not cleaned up before packing away after the last use, so it smells like the outdoors (Angel claims it smells like mossy earth and radishes). No visible mildew, but I should clean it as soon as possible. If anyone has any ideas on how to clean it in the middle of winter, indoors let me know. The biggest problem right now is all the rain we’re getting, so I can’t set it up outside to clean it out and hang. So I’ll need to do this inside maybe in stages. If I can’t get it cleaned out well enough it’s no big loss, it was $9.83.
Novara Arosa Bike Gloves – MSRP S29.50 bought at $9.83
These gloves fit very well and should be a great cool and dry weather glove, when my Novara Stratos Bike Gloves are just too warm. On the tag, the reason for return was “not warm enough”, but these will work well for me. They just needed a little stitching fix, and now they are perfect. I can’t wait to get to use them this coming spring.
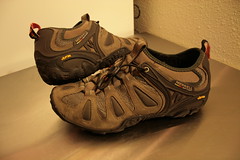
Merrell Chameleon3 Stretch – MSRP $120 bought $19.83
The shoes are hardly broken in and all the tread is there, including the fine tread that wears off fast. They should be great for hiking and walking.
GoPro HD HERO Camera – MSRP $239.99 bought $99.83
It was a big surprise for me to find this, and it was a hard decision to get it but I did. Angel and I shoot lots of videos together and we have always talked about getting one. This price was too fair to pass up. I can only imagine no one got it before me because: A. They didn’t know what it was, or B. They don’t do video editing themselves. The camera is in perfect condition. The reason for return was “didn’t like product”, and I don’t really know why they didn’t like it, but I like it already. It has HD video up to 1080p at 30fps, with 127º wide viewing angle. 60fps at 720p and WVGA resolutions allowing smooth slow motion playback with 170º wide viewing angle. With a waterproof case allowing it to go to depths of 180ft (60m), my Fuji XP10 depth is only 10ft (3m). Comes with mounts, including a one for vented helmets. This should get a lot of good, fun video footage that we can use. Great for long bike rides, or trips to the coast. Can’t wait.
I’m excited to get to use these new items and after I will write reviews for them, so stay tuned. There will be new videos as well with the help of the GoPro Hero.
Yesterday after reading a blog post from Eugene Bicyclist about the Fern Ridge Bike Path flooding at the underpasses below the streets. (Read Here) I decided to I wanted to check this out for myself, being my first year in Eugene. Before the ride, I constructed something I’ve been meaning to try out. I mounted my Fuji Waterproof XP10 camera on the the end of some “bull-horn” handle bars I got from a friend. I used a camera mount from a cheap small tripod and attached them to the end of the bar. It seemed to work out alright for the first day. This should give us a new perspective to add to the videos Angel and I make.
Here are 2 short video of the first test with the camera mount.
I got my Ortlieb Back-Roller Classic Panniers shortly after getting my Surly Long Haul Trucker in May of 2010. I tried one other set of cheap panniers for a short time, but decided I needed something a lot better. Ortlieb is one of the best cycling/waterproof bag companies around. The Back-Roller Classics MSRP is $165 for a pair. The panniers are made of a PVC-coated polyester fabric, with 2 inner pockets: 1 large, and a smaller mesh zippered pocket. On the outside there are large reflectors. These panniers roll closed and latch, and come with a shoulder strap that can be secured by a hook on the front. The bag is completely waterproof. The Back-Roller Classics use Ortlieb’s QL1 attachment system. These are super simple panniers to take on and off the rack.
Here is a cool video showing how to attach the bags, with some funky music.
I’ve had the panniers for almost 2 years, and they have held up really well. They fit almost everything inside, and have a capacity of 2,441cu.in. (40L). I have been able to carry tons of groceries. If a little added space is needed I just keep the top open and it stays pretty stable. I also tend to use the shoulder straps to strap down the odd items onto the rack, which is an added bonus. In my main pannier I keep my small essentials in the mesh zippered pocket: spare patches, lights, pens, and my spork. All my other repair essentials are in a small saddle bag. In the larger open pocket I keep my map, bandana and wrench. At the bottom of the main bag, I keep my rain cape and jacket, then anything else goes on top of them. Everything else goes in other one when I need to carry more, or balance the weight. Being waterproof is a must for the Pacific Northwest weather.
The QL1 System is perfect. It keeps the bags secure on the rack without rattling around. There is no fear of them falling off, but they are still super easy to take off when you pull up on the release handle. The shoulder strap is easy to use, but if you want something more comfortable, try out the Ortlieb Carrying System (read more about that lower on the page). I would recommend these panniers to everyone. I hope to get the Ortlieb Front-Roller Panniers to match once I get a front rack for my LHT.
Ortlieb has come out with new graphics on their Back-Roller Classic Design sets, MSRP $170 per pair. The Wave, Dot, and Splash designs come in 3 different colors each, more than doubling the Classic color choices from 6 to 15, 19 if you include the 4 special Civia/Ortlieb Designs (only sold in singles). With all the colors and designs you should be able to find the right set for you. Angel plans to get herself one of these new designs. I think they look great. *Update: Angel chose the Splash in the Aubergine (purple) with pink splash graphic. Read about and see photos HERE.
I also use the Ortlieb Carrying System which allows you to attach a removable backpack mount to any single Ortlieb Pannier. The panniers work well on the bike, but could be a little easier to carry off the bike. That is where the Carrying System comes into play, turning your pannier into an excellent backpack. I recommend this system for anyone who wants a pannier on the bike and a backpack off the bike.
If you are looking for a lighter PVC-free pannier, Ortlieb has a Back-Roller Plus version of the same pannier design made of strong Cordura fabric and their QL2 System. The Plus come in 4 different colors and cost $200.
Ortlieb (and Ortlieb’s sister companies: Tubus, and Racktime) have lots of other useful products and accessories.
A new app has been released recently to help with navigation on your bike if you own an iPhone. Bike Maps – Bicycle Directions for Commuting and Touring by Burning Robot is the new app offering turn by turn directions for bikes.
This is a review for Bike Maps Version 1.o.1 (12-13-11), I will try and do updated reviews if and when the newer versions are available.
Features
• Turn by turn directions
• Search by keyword or address
• Get bike directions from your current location
• Prioritizes bike paths and lanes
• Avoids busy streets
I downloaded this app for $1.99 to try it out myself. The app uses the power of Google Map’s Bike Route feature. Over all this app is very clean, and works fast over 3G cell service, but might be lacking some features some people might like. Some of what it is lacking is due to some flaws with Google’s Bike Routing, some are things the app developers might have not decided to add in.
The app is quick to access. Runs well pulling up maps over the 3G. When you open it up it takes you straight into the map, with a Search/Address bar at the top. Pretty bare bones which can bee good. You simply type in what you want in the search bar. Say “bike shop” it will give you the shops in your location, just like Google would. You click the pin on the map then it brings up information about that location, and you can just click the “Bike Directions” button on the page. From your current location only, you will be given a single suggested bike route to that location (the best bike route, according to Google, including distance, and time it will take). The route is highlighted on the map and the written directions are shown one at a time at the top of the screen, allowing you to see the map and directions at the same time. You then can click through arrows at the top right to use the turn by turn directions, which give you the distance and where to turn each step of the way.
Here are some things the app is lacking in comparison to the full desktop version of Google’s Bike Route feature. It doesn’t show highlighted bike routes, instead it just shows the standard map view. It would be nice if it showed the highlighted map view, then you could use it to plan your own routes. The app also doesn’t suggest multiple routes to choose from, it uses the very first route that would come up if you used the full desktop version. This can be bothersome because in many situations the first choice Google suggests is not the best one. Also there is no way to edit routes yourself. And the app only allows you to get directions from your current location. For the most part this will be fine, but it would be nice to be able to plan out routes from other locations.
I like this app even with what it might lack right now, it’s a good, straight-forward bicycle routing app and it lets you use Google’s Bike Routing feature on your iPhone. So if that is what you want, this will work for you. Also, there are no ads, which is always good.
To Burning Robot LLC or the developer: I have not found a way to contact you. I would like to find out more about what they are working on. So if you are out there please contact me.
Eugene has added a temporary sign, the one that flashes words, saying “Bikes Use Bike Signal Only”. This is great for cyclists and motorists who have yet to realize there is a newly placed bike only traffic signal last Thursday located at 18th/Alder. I am not sure when the light was actually placed or when they will remove it. But I think this is a good idea to help bring awareness to the new signal. To read more about the newly placed bike only traffic signal, read my article here; Eugene’s First Bike Only Traffic Signal
Angel and I both picked up new gloves for this winter cycling season. We got the Novara Stratos Bike Gloves (Men’s and Women’s) from REI. I have normally just worn whatever gloves I could find around the house. In Illinois I wore the cheap knit gloves you can find at most all stores, with wool mittens on over them. It worked for the short rides I had to work, but didn’t block the wind at all. Mittens don’t really work well with drop bars. So I started using some Fox River Gripper Gloves. They worked well for gloves but just ended up being too loose after a while, and also didn’t stop the wind. After moving out here to Oregon, I ended up just using those rubber palmed winter garden gloves that I also used at work, working in the freezers. That style of garden gloves work well in fall and spring, they cut out some wind and kept my palms dry if my bars got wet, but didn’t cut it for really cold days and rides longer than 15 minutes. I would sometimes show up to school with completely numb hands.
So this year we decided to get some real winter cycling gloves, and we are happy we did so. We both got the Novara Stratos Bike Gloves (Men’s and Women’s) because we liked the idea of lobster style gloves, but having the index and middle finger separate allows for the dexterity needed for drop bar brake levers. These gloves have large cuffs with synches to go up around your jacket. The synch has nice set up, locking cord on one side and unlock on the other. They have synthetic palms with nice grip, and a small amount of padding, with added grip on the finger tips. They cut the wind, repel water, and are nicely breathable just like they say. There are reflective accents and a nice large amount of fleece on the outer part of the thumb for wiping your face. They fit nicely, I went with the XL, which might be slightly larger then I needed, but it allows for good movement and the ability to fit a glove liner with out being too bulky. I think these are great gloves and I am happy I got them.
On Thursday, Eugene got its first bike only traffic signal at the intersection of Alder crossing 18th. It looks like a standard traffic signal with green, yellow and red lights but in the shape of bicycles. The signal right now is considered temporary, only until they get a yellow housing for it, as well as its own mast. It’s a much needed addition for this intersection of the recently redesigned Alder. It allows cyclists to cross 18th safely without the worry of being cut off by cars. Alder is now a one way for cars going south, and 2 lanes for bikes going north and south on the other side of the road. This is an intersection with lots of traffic especially coming away from the university on Alder. I have encountered a couple times where cars would try and turn left in front of me, even with multiple cyclists waiting next to them in the bicycle lane. Hopefully Eugene starts adding more of these bike only traffic signals at other busy intersections. North of 13th of Alder could really use them and it seems like they plan on that from the looks of it.
Some background on the bike only traffic signal: In June the Governor signed SB130 into law which adds bike only signals to Oregon’s list of traffic control devices. (You can read more about the bill here: Bike Portland and Oregon Live) Portland was a big push behind this bill and is working to get its first couple bike only signals in. Portland has been a great help with the innovation of bicycle infrastructure in the US.
This was going to be a simple review on using iron-on reflective tape to enhance your visibility while riding. But with recent news of many cars hitting cyclists, I have decided to do my part to try and keep cyclists safer on the road.
I am young. When I first started riding I never even wore a helmet. I first thought they didn’t look “cool”. (I had one, I just didn’t wear it until I moved to Oregon). This article is NOT about whether you should wear a helmet or not. That all depends on how you are riding and where, and it’s up to you. I will say I now think helmets look cool, and is a great place to put reflective tape or even small lights. I wear mine, and now feel weird if I walk out of the house without having it on, even when I know I’m not riding my bike.
I’ve come a long way since my early years of riding, and have now started using most all safety items. Even thought I never thought I would.
In order of when I started using them:
Front blinking light
Any number of blinking rear light depending on where and how long I am gone.
Helmet
200 lumen front light
Any number of blinking rear lights depending on where and how long I am gone.
In wheel orange lights
Reflective tape on helmet, bike, and anything else. More Here
ANSI Class 2 Reflective Vest (something I never thought I would do)
All these things help you be seen and hopefully keep you out of danger by other cyclists, pedestrians, and car drivers. This was really just going to be about adding some reflection to your person right now. There are a number of ways to help you be seen while riding.
Photos and more about staying visible and safe after the page break.
I grew up in central Illinois. In August of 2007, I bought my first real “adult bike” after needing a bike to save money on gas. Since then I have had many bikes. In April of 2010, after moving out to Oregon, I got my beloved Surly Long Haul Trucker. I have put a lot of good miles on the bike. This blog is about my life in Eugene.

 Yehuda Moon and the Kickstand Cyclery comics are back today. The comic was on a short hiatus while Rick Smith and Brian Griggs figured out what to do with the strip. There was a Kickstarter to raise money for Volumes 2, 3, and 4 to be printed into books. They only needed $18,000 for their goal to produce the books, but ended up with a breathtaking $44,054, from 660 backers. Which is great, I can’t wait to get my volumes in the mail anytime now I would imagine.